Authentication & Security
This chapter covers the authentication and security concepts for the Smart Connect API. All API requests require a valid API key for authentication and authorization.
Authentication
The Smart Connect API uses API key authentication. To access any endpoint, you must first generate an API key through the API Key Management and then include it in the header of every request. The general flow looks like this:
%%{init: {'theme': 'dark'}}%%
sequenceDiagram
    participant Customer
    participant SC as Smart Connect API Key Management
    participant API as Smart Connect API

    rect rgba(40, 44, 52, 0.6)
        Note over Customer, SC: API Key Generation (One-Time Setup)
        Customer->>SC: Open Smart Connect home page
        Customer->>SC: Click "API Key Management"
        Customer->>SC: Enter a valid key name & expiration period
        Customer->>SC: Click "+ Generate"
        SC-->>Customer: Display API Key (shown only once)
        Customer->>Customer: Copy and securely store the API key
    end

    rect rgba(40, 44, 52, 0.6)
        Note over Customer, API: Using the API Key
        Customer->>API: Request with header x-custom-api-key: {api_key}
        API-->>Customer: Response data
    end
Generating an API Key
To generate an API key, follow the steps outlined below:
-
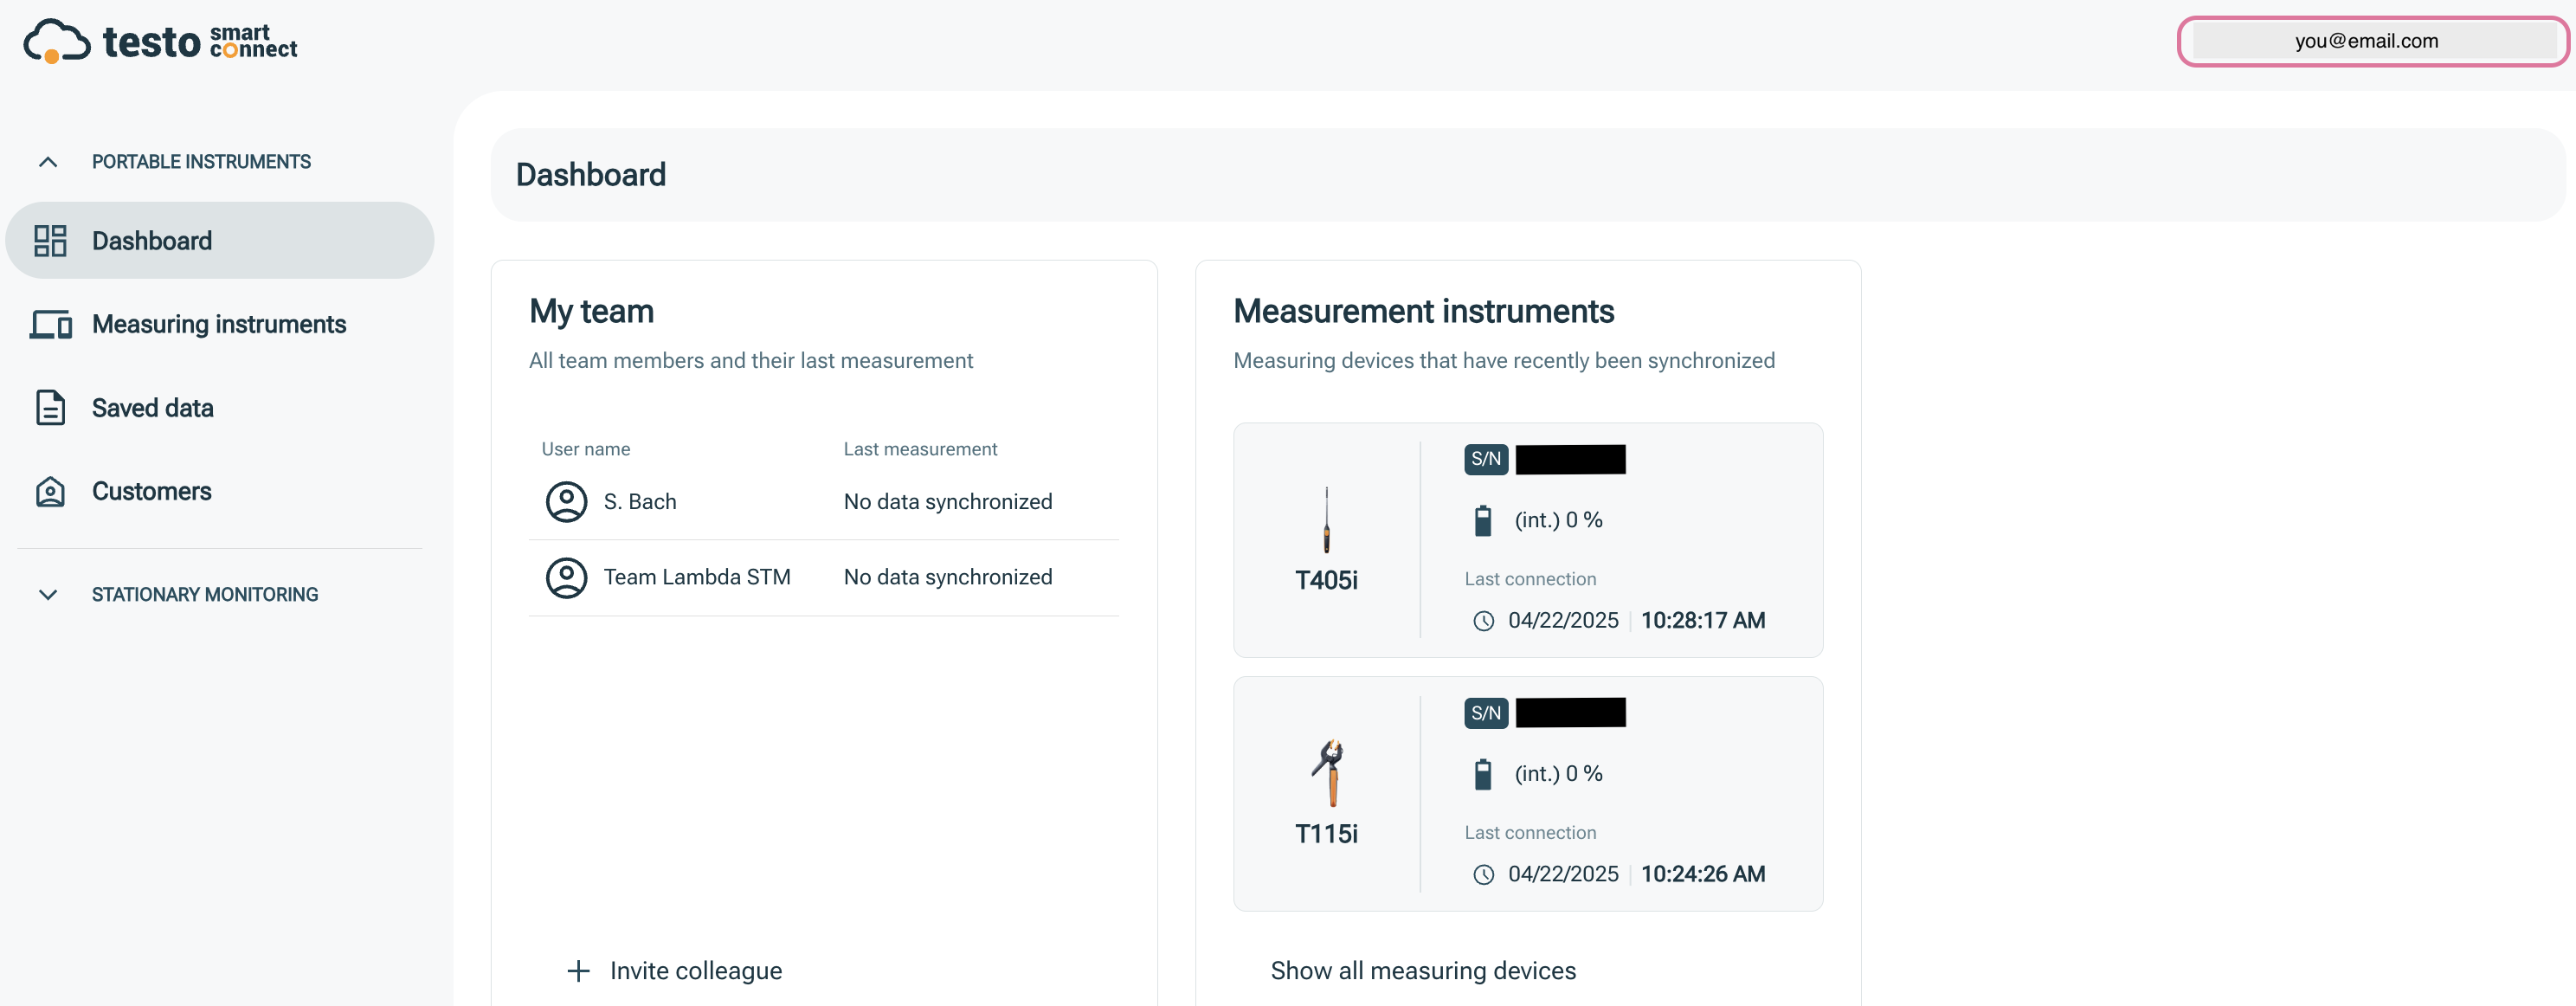
Open the Smart Connect home page.
-
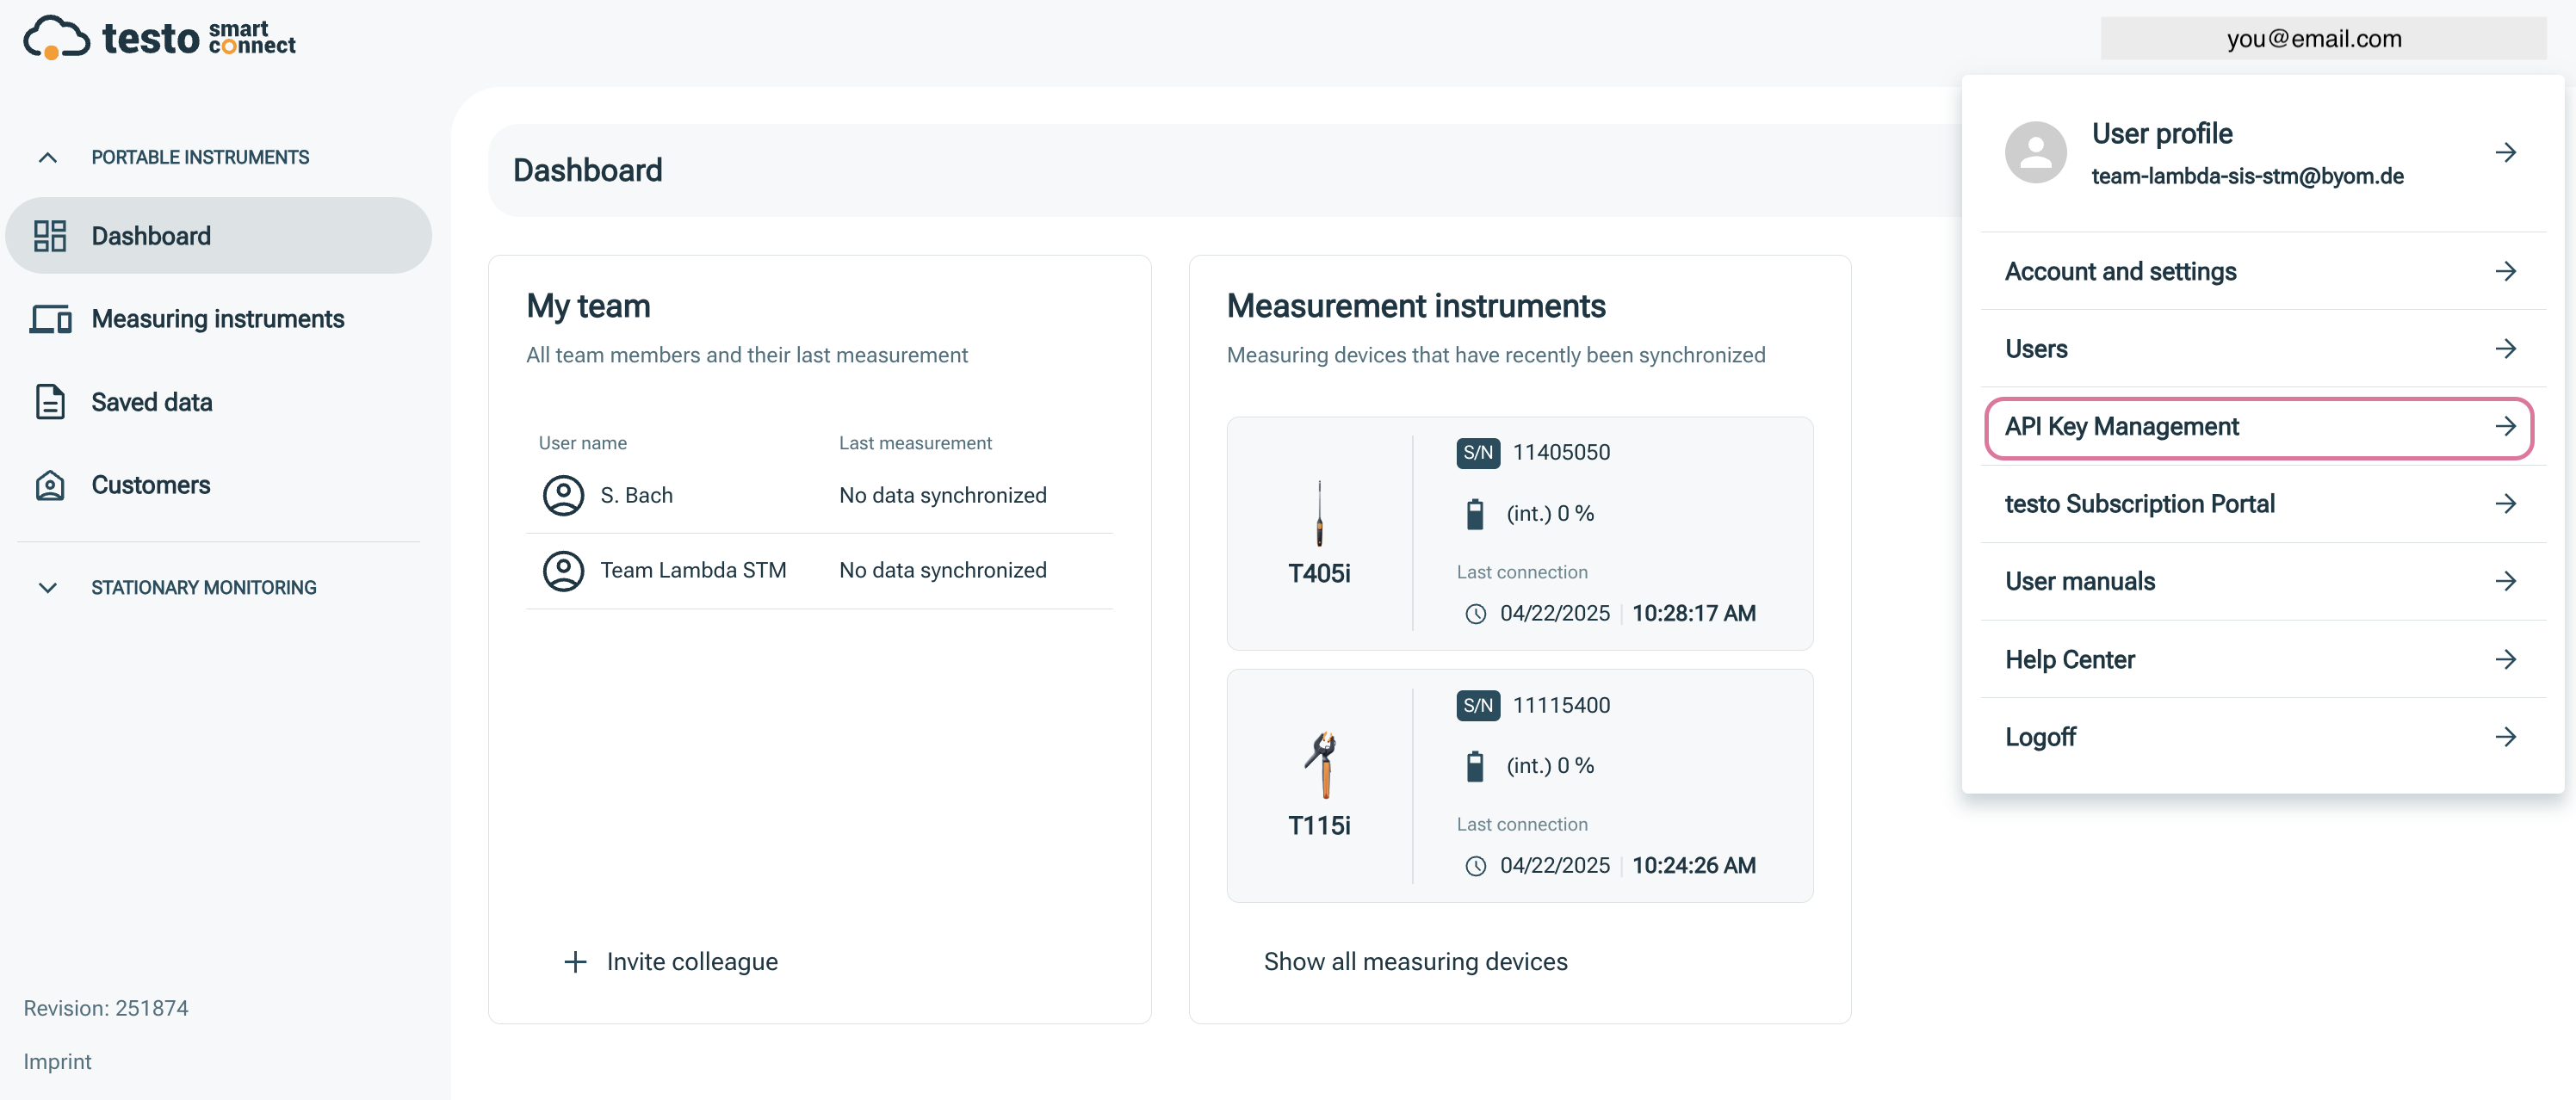
Click on your email address in the top-right corner of the home page.
-
In the dropdown menu, click on API Key Management.
Note
If the API Key Management section is not displayed, you first need to purchase the corresponding add-on via the Subscription Portal. Once done, the section will become visible in your Smart Connect home page.
-
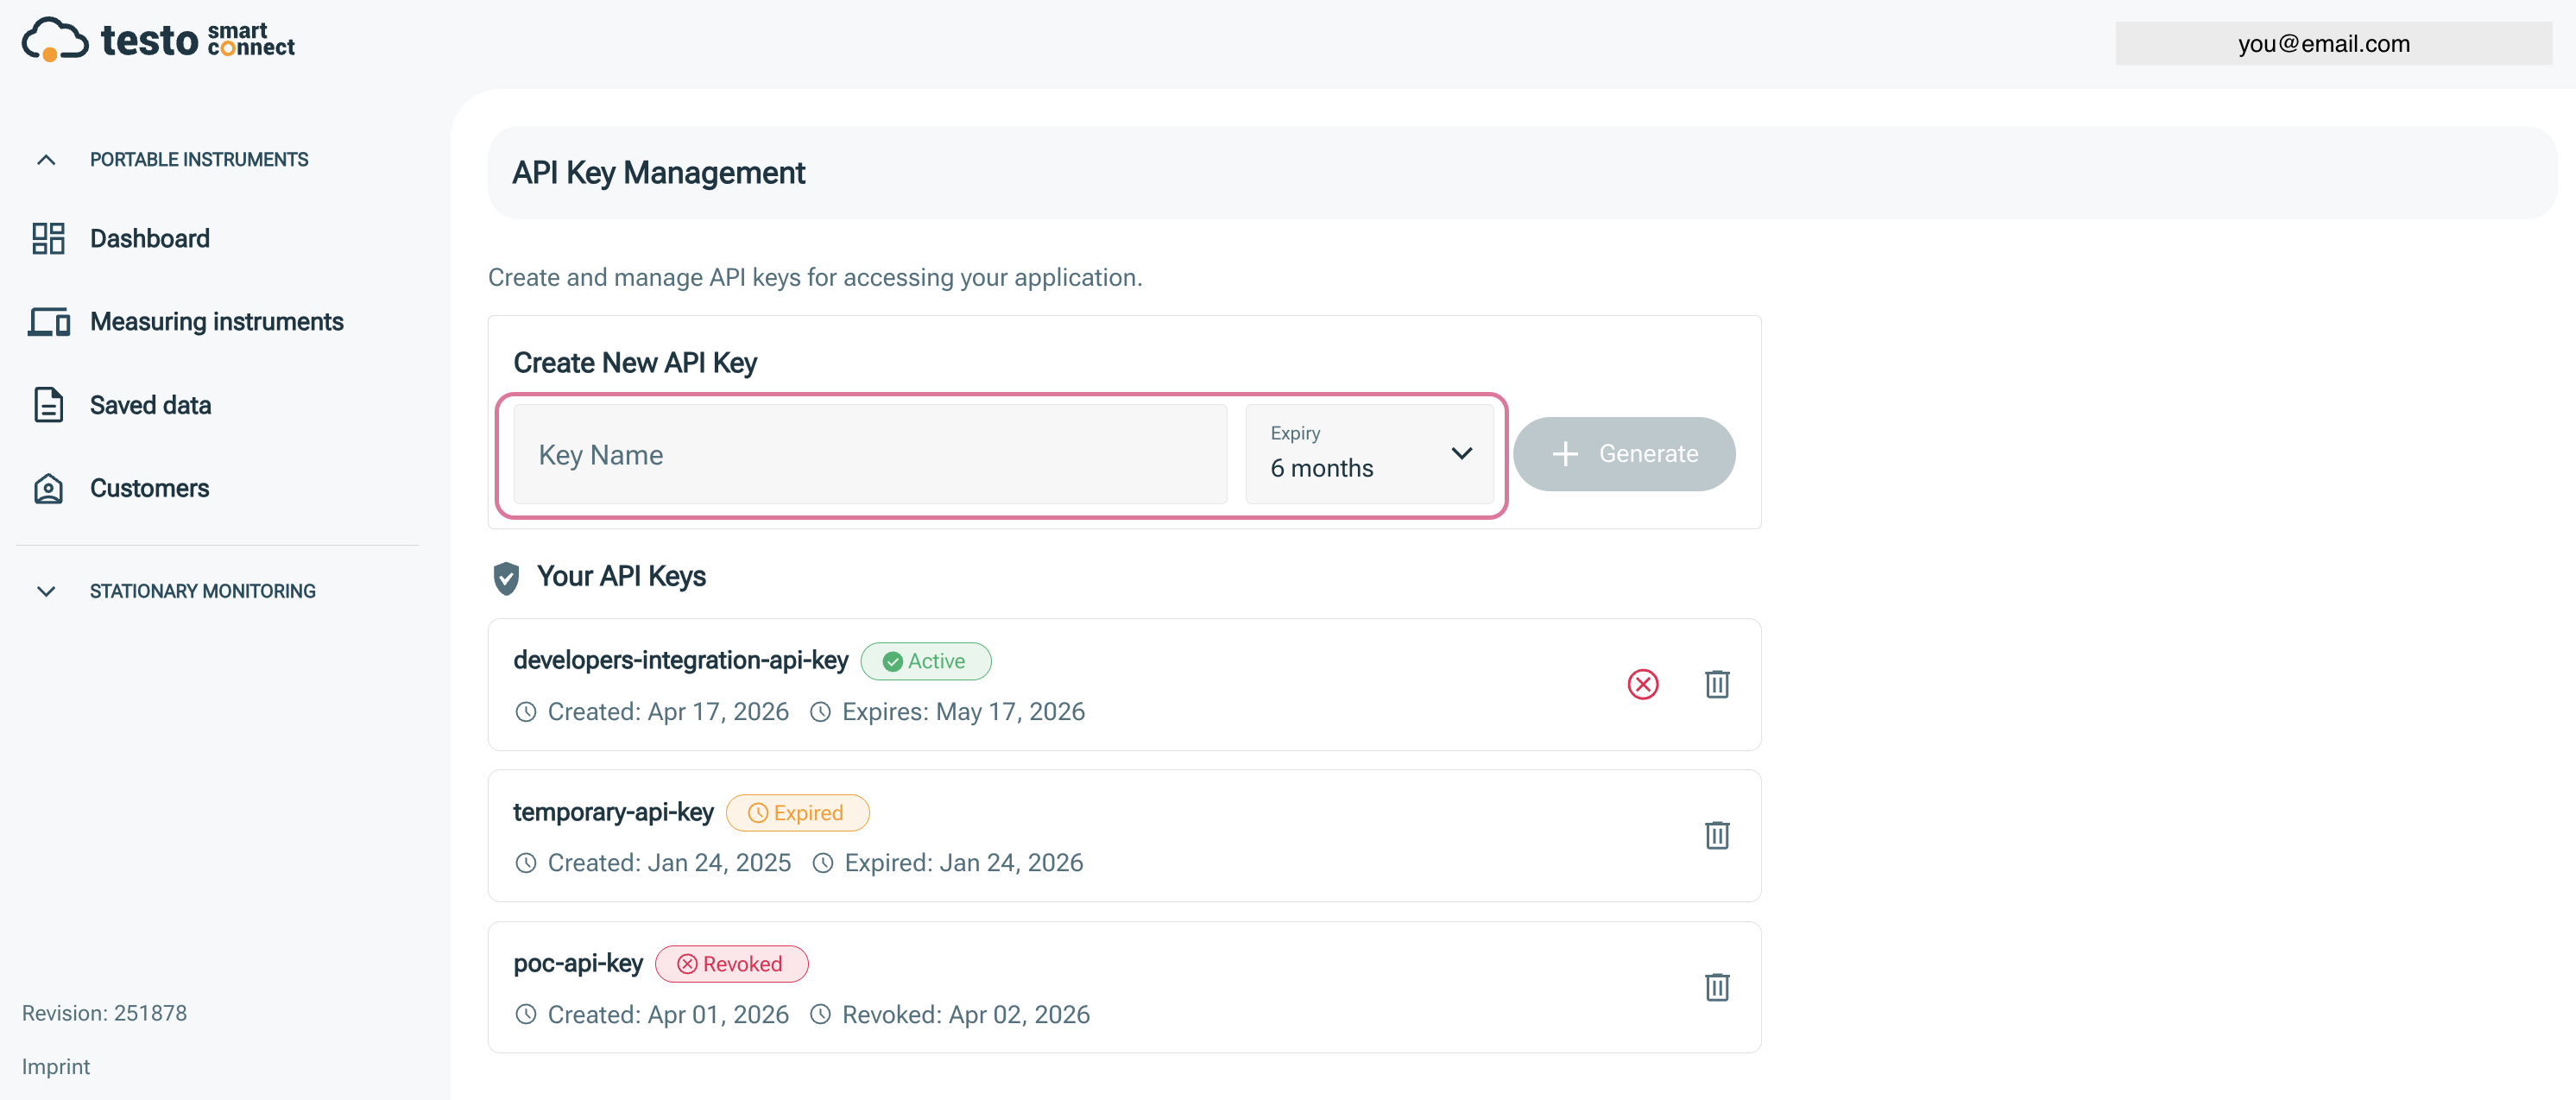
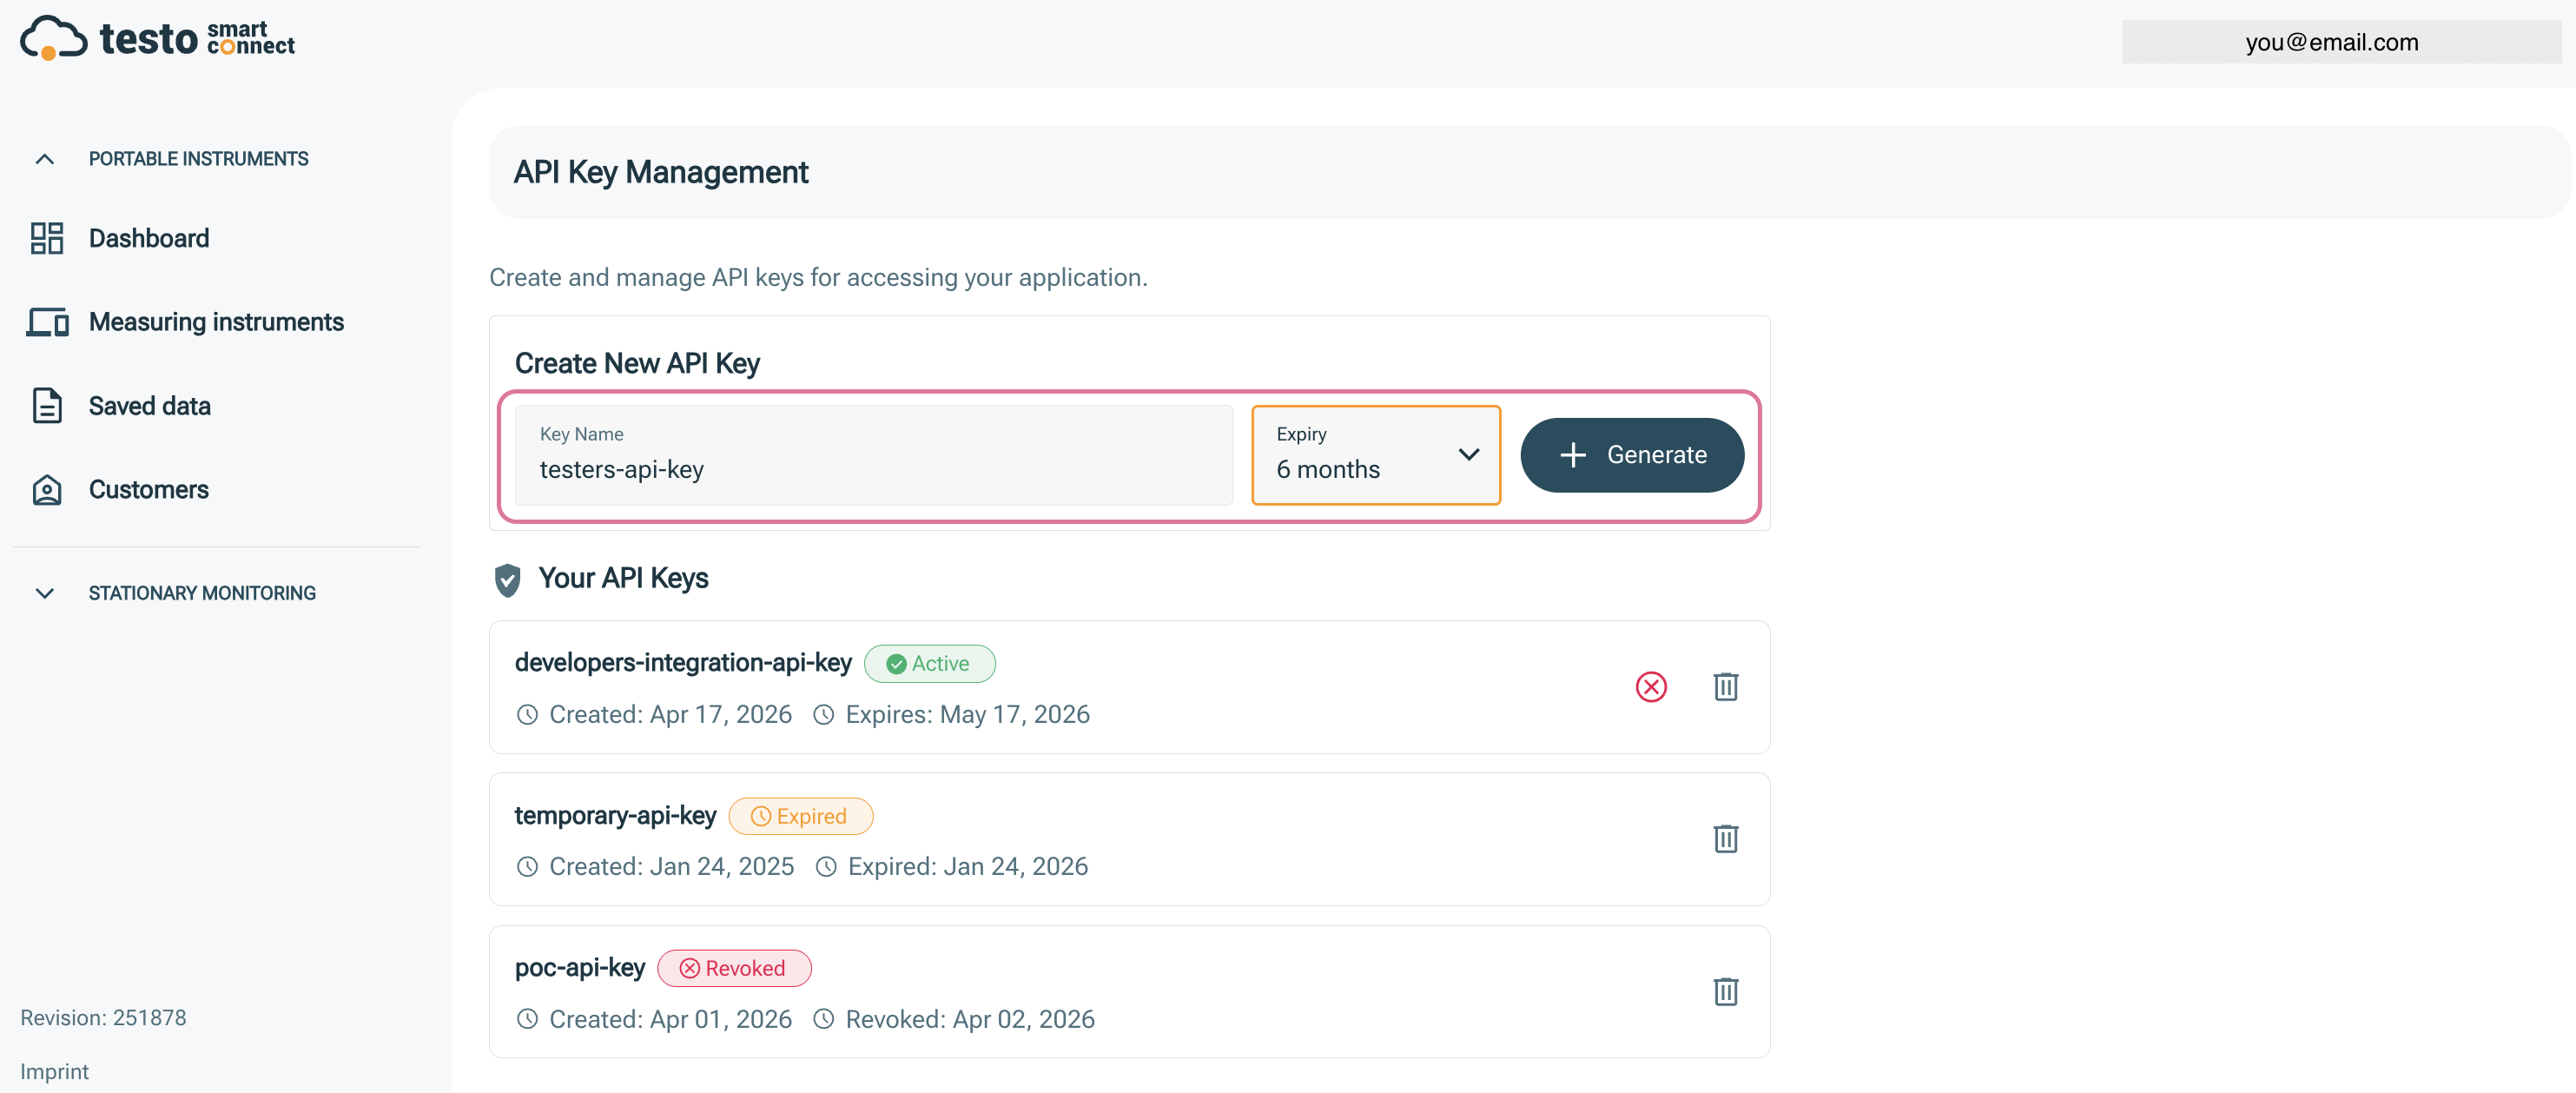
In the Key Name field, enter a descriptive name for your key (e.g., "Production API Key"). Also, select an expiration period from the dropdown menu. The maximum expiration period is one year.
-
Click the + Generate button to create your API key.
-
The newly created API key will be displayed in a yellowish-orange box. Please click the Copy button to copy the key and store it in a secure location — it is only shown once.
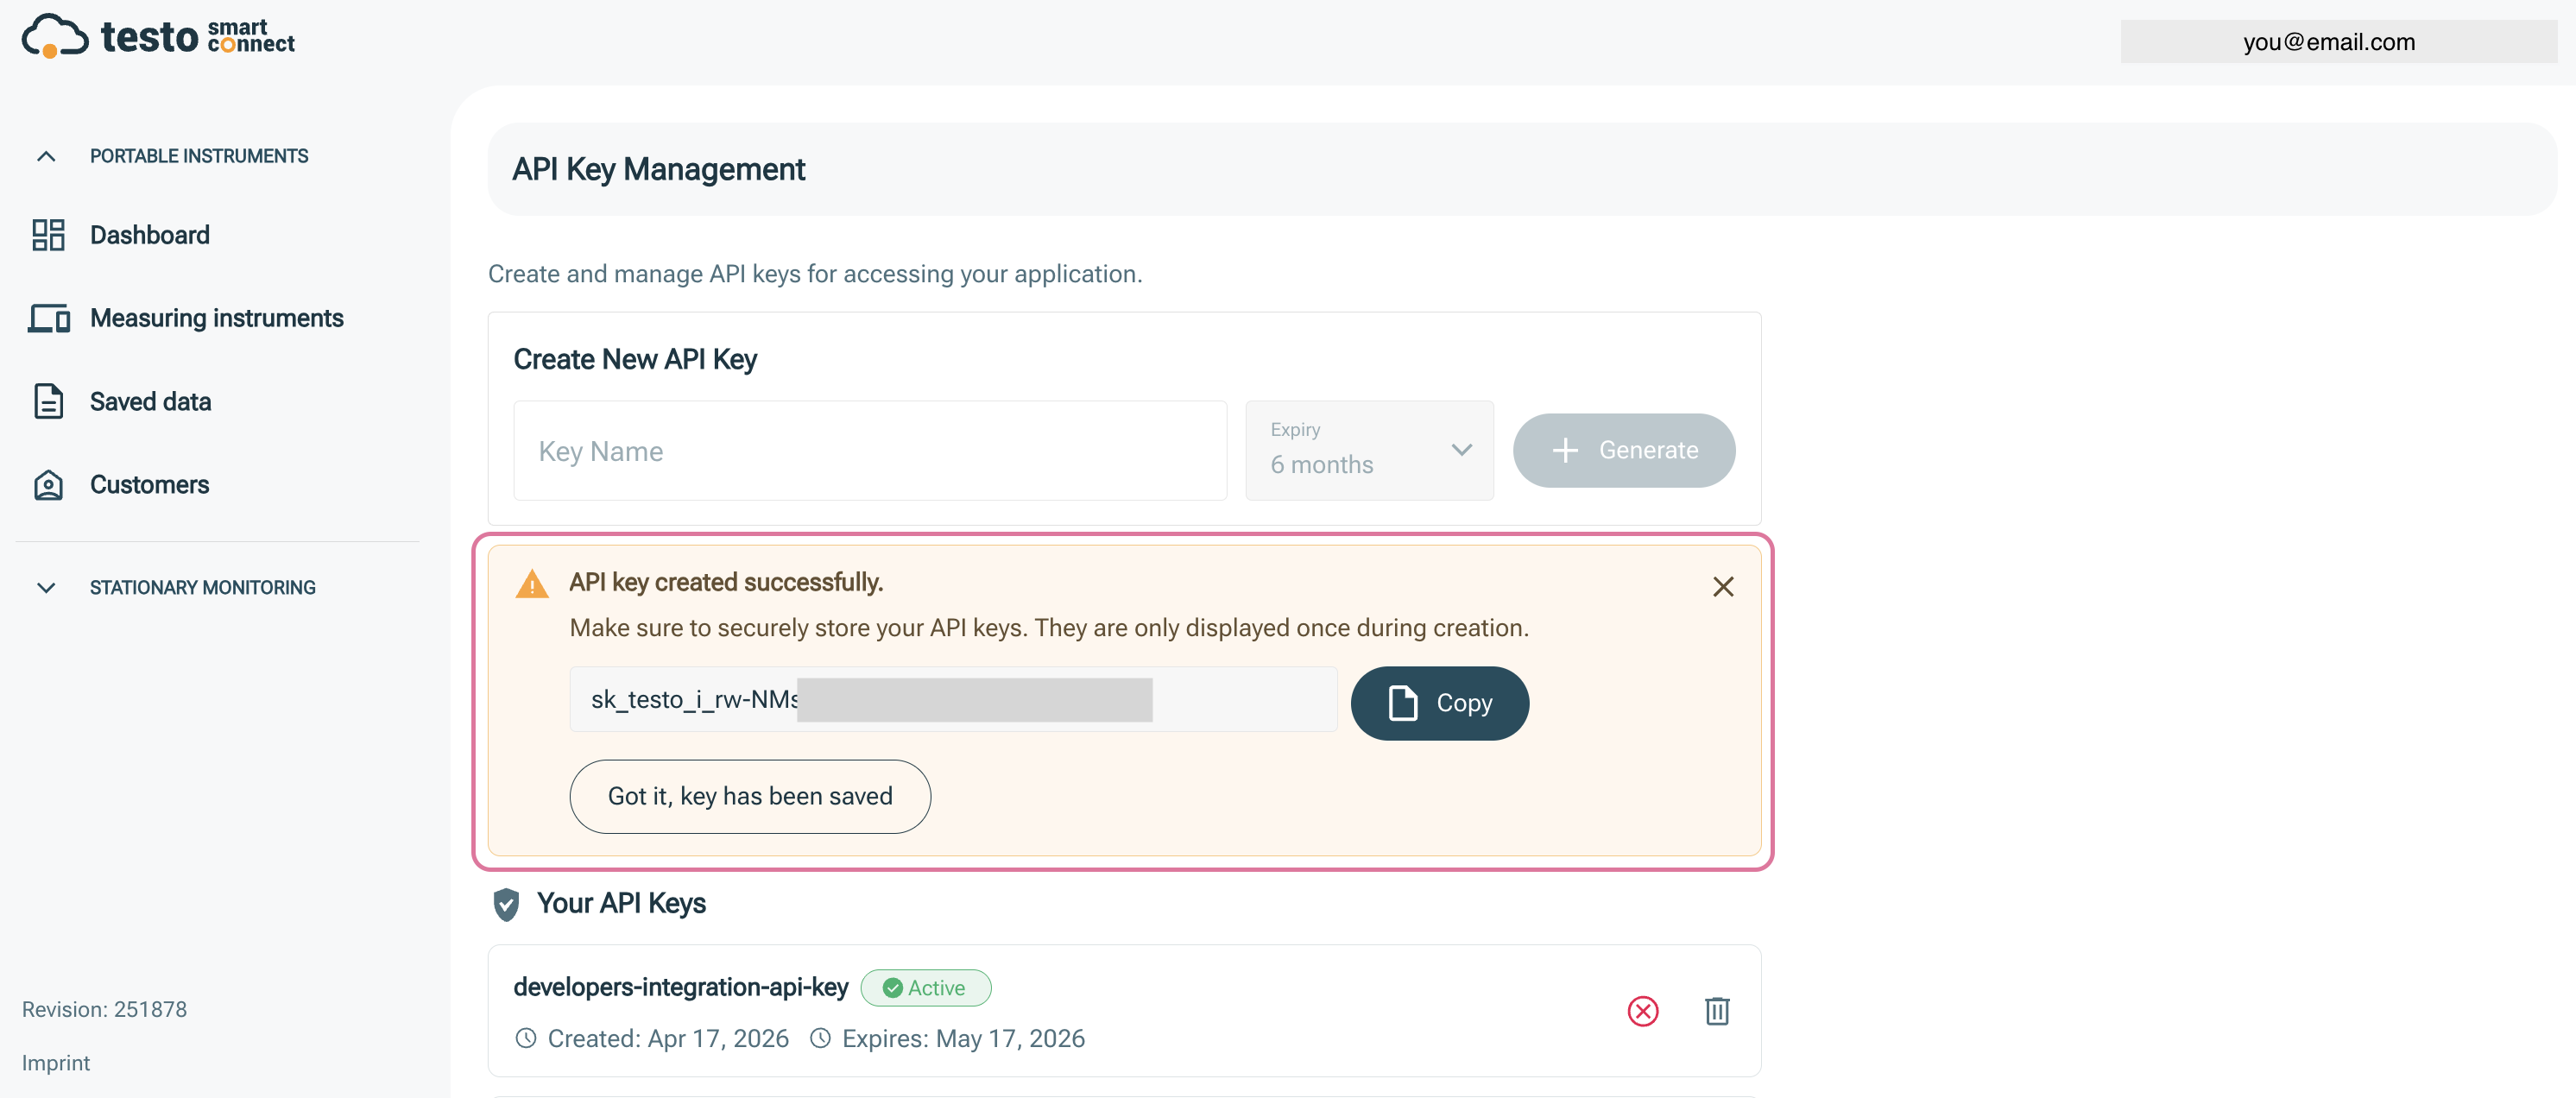
-
Once you have safely stored the key, click "Got it, key has been saved" to confirm.
- In your API client, replace the old
Authorization: Bearer ...header withx-custom-api-key: <your_key>.
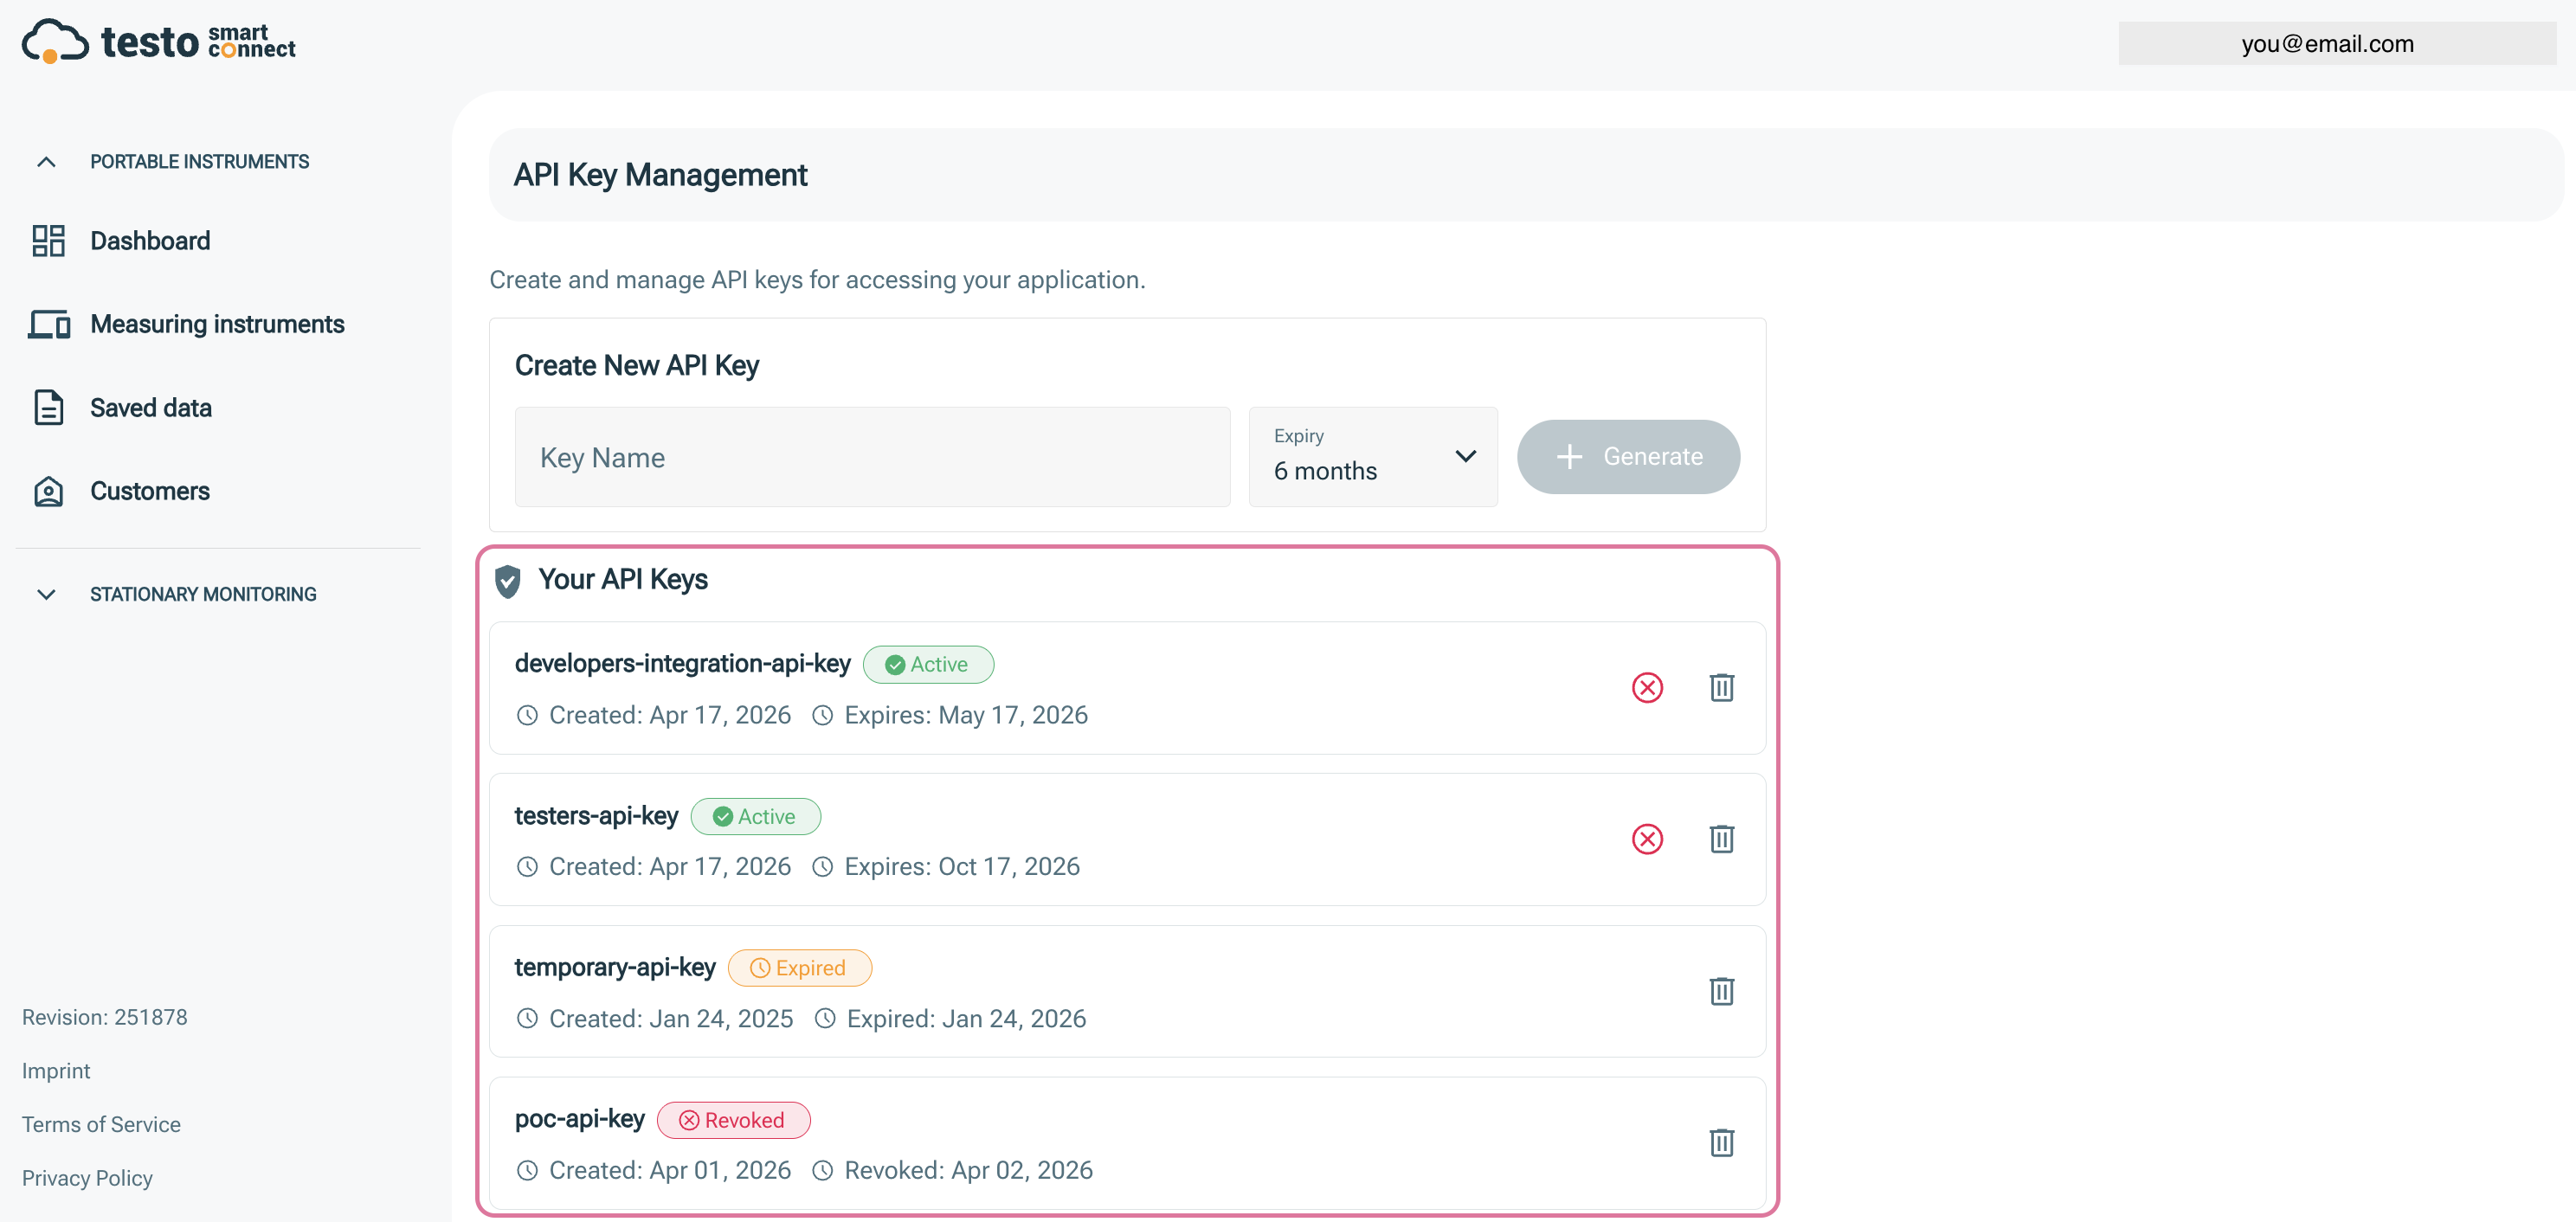
You can see the list of your API keys — including active, expired, and revoked ones — along with the newly created key.
Using the API Key
To authenticate your requests, include the API key in the x-custom-api-key header of every API request.
Example using curl:
curl -X POST 'https://data-api.<region>.smartconnect.testo.com/v3/devices/properties' \
  -H 'Content-Type: application/json' \
  -H 'x-custom-api-key: your-api-key-here' \
  -d '{}'
Example HTTP request:
POST /v3/devices/properties HTTP/1.1
Host: data-api.<region>.smartconnect.testo.com
Content-Type: application/json
x-custom-api-key: your-api-key-here
All API endpoints require a valid API key. Requests without a valid x-custom-api-key header will be rejected with a 401 Unauthorized response.
Key Expiration and Renewal
API keys have a limited lifetime based on the expiration period you selected during generation. The maximum expiration period is one year.
When your API key is approaching its expiration date, you should generate a new key from the API Key Management before the current one expires. This ensures uninterrupted access to the API.
Warning
Plan ahead for key renewal. Once an API key expires, any requests using it will be rejected. Generate a replacement key before your current key expires to avoid service interruptions.
Best Practices
- Store keys securely: Never expose API keys in client-side code, public repositories, or shared documents.
- Rotate keys periodically: Even before expiration, consider rotating your keys regularly as a security measure.
- Use separate keys per environment: Generate distinct API keys for development, staging, and production environments.
- Revoke unused keys: If an API key is no longer needed, revoke it to reduce the risk of unauthorized access.
What Next?
We recommend proceeding to the API Reference to explore the available endpoints. If you are not yet familiar with the asynchronous request model, read the Concepts chapter first.